How to Install Wordpress on Windows Shared Server from Verio
MAY 8 2010
Before even writing anything about installing the wordpress I would like to say that I love Verio as a web hosting company. The company’s service is much better than any cheap shared servers, low-cost web hosting companies will sell you the space for a $1 per month but the after effects will be terrible.
Almost no or list customer support and server down time will be unaffordable for these cheap web hosting companies. The web page load time will be much more than others, it might affect your search traffic because of all these factors so better prefer a reliable web hosting company like verio compared to these cheap ones by paying few bucks extra.
Steps to Install Wordpress on Windows Server with IIS6/7
- Buy a $9.95/mo Basic Windows shared hosting plan from verio.
- Click here to download the wordpress software. Don’t think the wordpress software for windows server will be in different programming language like classic asp or asp.net, it is the same package and php source codes.
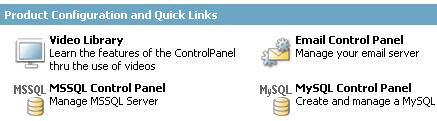
- Login to your verio control panel and create a MySQL database.
- Unzip the file and open readme.html and follow the steps to edit wp-config-sample.php.
- Push all your files to the server and follow the steps from readme.html to configure the wordpress.
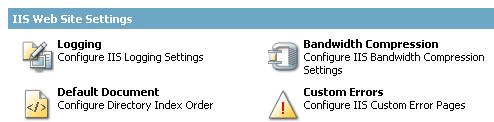
- Your blog will still not show up because the default file to load is not index.php yet. Go to Site Details for your parent site in Verio control panel and click Default Document link under IIS Web Site Settings. If you see index.php is already listed then push it to the top or add and make it the first file on the list. Go back and check if your blog is loading right now. When I checked my blog it was giving me 500 internal server error. What could have been the cause of this error, I opened index.php to see what’s going on and realized it happened because there is extra “./” in “require('./wp-blog-header.php');”. I deleted “./” from that line and pushed the index.php to the server to make it work so if you do the same then remain watchful when you update your blog automatically and delete it on needed.
- Optional: I also gave read, write and execute permissions to wp-content folder. You can skip it and later if you realize that you can’t write something to this folder then go back to the verio web hosting control panel to manage it under Directory Permissions.
- For SEO purpose you need to have pretty permalinks, right? Here was the turning point for me. I tried many ways to get the first success but thanks to God I could resolve it.
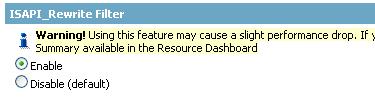
- Go to parent site under the web sites tab in the verio control panel as shown in the picture and click URL Rewrite for IIS. Select Enable and click Apply Changes.
- In your wordpress dashboard there will be a Permalinks link under Settings on the left side. Click the permalinks link and select Custom Structure under common settings, paste /%postname% in the text box. This will generate urls like www.example.com/about-us. You can click Save Changes now.
- You will get an error message that wordpress can’t write to .htaccess, remember this is a windows box so there is no .htaccess file in the root folder. Either you copy the codes given by wordpress on the page or copy from here to create a .htaccess file of your own. Just open a notepad, paste the code and save as .htaccess. Push the file to the server and you are done now.
<IfModule mod_rewrite.c> </IfModule>
RewriteEngine On
RewriteBase /
RewriteCond %{REQUEST_FILENAME} !-f
RewriteCond %{REQUEST_FILENAME} !-d
RewriteRule . /index.php [L]
- Now go and check if your blog is serving with pretty urls or not. If you don’t get 404 page not found for your pages then you are all set, if you find an issue with loading your pages then write me here, I will try my best to resolve the problem.
How Do I Exchange iPhone 3G with iPhone 4 >>
<< How to Add Subdomain in Godaddy

Most Popular Articles
- 4 Easy Steps to Start a Personal Blog with Wordpress
- A Simple Guide to Troubleshoot Your BSNL DSL or Broadband Internet Problem
- Setting My Blogging Goals for 2017
- How to Install Wordpress on Windows Shared Server from Verio
- How to Add Subdomain in Godaddy
- What You Need to Know About a HTML Title Tag
- Ways to Check Content Plagiarism
- Should You Buy Links
- How Do I Exchange iPhone 3G with iPhone 4
- What to Write in a Personal Blog
COMMENT
Name: Patrick Stephens
Hi San. This is a great article as I have a Verio IIS server and am trying to run wordpress on it. When you say you push the .htaccess file to the server, which folder to you push it to? An also can you FTP it over?
Thanks for any help you can provide. I haven't made my blog my new front page yet but will be doing that soon. That might be an issue but this is the code the permalinks page gives me:
<IfModule mod_rewrite.c>
RewriteEngine On
RewriteBase /blog/
RewriteRule ^index\.php$ - [L]
RewriteCond %{REQUEST_FILENAME} !-f
RewriteCond %{REQUEST_FILENAME} !-d
RewriteRule . /blog/index.php [L]
</IfModule>
Thanks again.
Name: San
Hi Patrick, It seems from your code that you want your blog under domainname.com/blog. If i am right then push the .htaccess to "blog" folder. Yes, you can ftp it.
Name: Patrick Stephens
Hi San. Thanks for the help. I think I got it all figured out. Now I have to work around the CHMOD (Unix comman) that's not available on a windows server that I'm verio is hosting my website on. This was a big help this article. Thanks.
Name: Rob
Hi San Thanks for this article. You seem to know very much of this. Got a question for you. I have my website on a shared plan. Is it possible to configure Wordpress on a hosted site? (not the main) It looks to my that the mysql database is only available to the main host website. For the second I see only MSSQL Express database, wich is know to have compatibility issues with wordpress
Name: San
Hi Rob, I have couple of doubts. Is the secondary site that you are talking is a sub-domain or another domain under same shared hosting package? Either case if you have not used the MySQL for your primary site then activate it for the same but use it for the secondary site. Wordpress can talk to the remote servers so you should have no issues to install a wordpress as long as you have correct host name, db name, db password configured in config.php
Name: Hussain Ali
I'm verio and have enabled ISAPI rewrite 3. I have tried everything you mentioned above and in other websites. My problem is when i try to access a webpage with permalinks, the browser shows a blank page. I am not sure if the issue is with my wordpress settings or Verio settings (may be file bindings or something). i have windows multi-site account with verio. any help will be appreciated. thanks
Name: San
Hi Ali, I have a sample website with Verio $9.95 package (wabasi.com). I have doubts as you have a little different account than what i have. So it could be something from their end, you can see the sample site wabasi.com and on needed contact the verio support and show them this site to resolve your issues.
Name: Alex
what is the host name for verio?
Name: San
Hi Alex, you can find the host name in your control panel of verio web hosting package.
Name: Mark
Hello San, This post is AMAZING - thank you so much it saved my tons of time setting up the blog. I am having a problem with the URL re-writing however. I enabled it and am using the nice SEO URL names but all of those pages do not exist / I am getting a 404 error when clicking thru to view those posts. Any idea what could be going on? Thanks in advance!
Name: San
Hi Mark, it is really tough to guess where you might have gone wrong because I have no clue about your environment. If you are at verio and followed my steps then crosscheck what version of .net they are running, this creates some problem as well.
Name: Devarajan
Hi San, I do hold a verio windows premium account for last 4 years. Yes, Verio has been one of the best hosting, though bit costlier. But what i hate is too much of SECURITY restrictions and email administration is a mess. webmail login available only with primary domain.
Wordpress installtion, Thanks for your article here. today it helped me to setup Wordpress 3.2.1. Precisely I had to
1) remove ./ inside index.php page. Otherwise it was coming white blank page.
2) place the .htaccess file.
successfully installed. thank you. www.devaski.com - running on blogengine .Net framework)
Thanks a ton for the post.